Wednesday, May 19, 2010

Shading and Contouring


Blusher suits all skin types, and comes in so many different shades. Bronzer can be used instead, for darker skins if preferred. Sweep the blusher over the apples of your cheeks and extend up over the cheek bone. If your make-up is going to be photographed, you can be a bit more heavy-handed. Bronzer is perfect for adding a summer glow to your skin, use under the cheek bones, on the forehead and chin. It can used on your neck if it is paler than your foundation and decolletage. Shimmer products can be used around the eye socket, and on the collar bone. If you would like to minimise a facial feature, remember that a darker shade hides, while a lighter shade accentuates.
Brows


Keep your eyebrows looking their best by regular tweezing. If you are unsure how to create a good shape, have them done professionally, then you can keep it up yourself at home. Brow pencil really gives a polished look, you just need to find the correct shade. Avoid going too dark unless you have black hair, or the effect can be very harsh. Use feathery strokes over the hairs, filling in any gaps and extending at the ends if necessary. Brow gel is perfect for those wayward hairs!

Lip Service


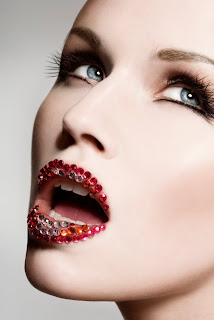
Firstly, make sure your lips are in top condition by applying a lip primer or balm while you are applying your eye make-up. Then use a lip liner, - the colour should be almost an exact match to the shade of lipstick or gloss you plan to wear. Outline the lips and fill in the whole area to create a matte base. Then, using a lip brush, apply the lipstick or gloss. If your eye make-up is dramatic, opt for a more natural lip, and vice-versa. When applying red lipstick, keep concealer handy on a thin brush to correct mistakes. Use gloss over lipstick to create the illusion of fullness, on the middle of the lower lip and on the cupids bow. You can also use a highlighter on the cupids bow for a fuller pout.

Falsies!


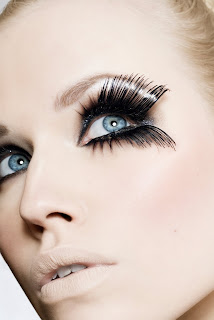
Fake lashes can create a really dramatic effect, whether you use just a few individuals or strip lashes. It is worth investing in a good lash glue like Mac or Make-Up Forever, instead of using the glue that comes in the lash box. Apply your lashes just before you put on mascara. First measure the strip lash against you own lashes, a small piece may need to be cut off the ends. Then place a small amount of glue on you hand and drag the lash base through, thoroughly coating it. Then carefully press down the lashes onto your own, using tweezers. Then apply mascara to your lower lashes. Finish off with a line of black eyeliner on your upper lid to hide the join. The glue should dry colourless, if not, use some black eyeliner over the white areas. Individual lashes are applied in the same manner using tweezers, and create a more natural effect. Have fun!

Monday, April 26, 2010

Open Your Eyes

You are now ready to start on the eyes - use an eye primer to make your colour last all day. Your first colour, applied over the whole lid and up to your brows, should be an off-white shade. Then, apply your second darker shade over the lid, working out to in, leaving the inner area of your eyelid clear. This will create the 3-dimensional effect. Use your darkest shade on the crease only, to add depth. A good crease brush is a must, it works much better than a flat brush on this area. Use a blending brush to bring the shades together. You can add more of the off-white shade to the area under your brows and on the inner area of you lid.

Eyeliner is a personal choice, you can use liquid or cake liner for a dramatic look, or a sharp pencil in black or brown for under the eyes and above the top lash line. An extremely fine paintbrush from your local art shop is great for liquid and cake liner, it makes the application easier. Keep a cotton bud handy for those mistakes! Glitter liners are perfect for evening looks. Eyelash curlers are great to open up your eyes, use them before mascara. Mascara brushes come in different shapes and sizes, you will by experience, find the one perfect for your lashes. Again, black and brown are the best for daytime wear, navy and purple can be worn at night.

Thursday, April 22, 2010


Make-Up 101

Creating The Illusion of Flawless Skin

The first step in preparing your canvass is to ensure that your skin is in good condition. This means exfoliating and moisturising regularly. Look for an exfoliator with very fine particles, that won't damage your skin. A good primer , like MAC or Laura Mercier,will create an even finish, and keep your foundation from wearing off too quickly. The success of your foundation, tinted moisturiser or mineral powder relies on achieving an exact match to your natural skin tone. Ideally you should match your foundation to your jawline in daylight, bearing in mind that you might be getting a tan for the occasion. If the foundation looks too pale, you can warm it up by adding bronzer (Rimmel Sun has all the shades) t o the areas that usually get caught by the sun - forehead, nose, chin. Bronzer is a great contouring tool, use it on the areas you want to minimise and use a shimmery highlighter on areas you want to draw attention to, like cheekbones. ( Barbara Daly does a good one ). Concealer is the next step. Use it on scars, blemishes, red lines and shadows to create a flawless finish. Look for a heavy-duty one if you have tough blemishes, (like Vichy Dermablend) , and use only on those areas. Use a lighter-textured concealer under the eyes, as not to emphasise fine lines or drag at your skin. An illuminating pen is perfect for all ages. Finish your face with a translucent powder, either pressed or loose, to set your make-up. You are now ready to add colour!